Do your sublimation prints look washed away? Are you trying hard to achieve vibrant prints like the ones you see in Target? Well, it’s not that hard!
You just need to avoid some common mistakes and apply the methods correctly. Some advanced tips can also bring out 10x the results of your print. Want to check out what they are? Scroll down!
How To Make Sublimation Brighter?
To make sublimation brighter, you have to use high-grade sublimation ink, sublimation paper, a printer, and a functional heat press. By setting the correct ICC profile, adjusting the colors before print, and maintaining the correct time and temperature, you can brighten your sublimation prints.
15 Best Tips For Making Sublimation Ink Brighter
Sublimation print quality can vary depending on various factors. Here are 15 tips on how you can make your sublimation ink look more vibrant and long-lasting.
1. Quality Ink Selection
Using high-quality sublimation ink will take your sublimation prints to another level. They’ll look more vibrant and fresh. Moreover, high-grade inks ensure the durability of the print as well.
So, here’s how you can select a top-notch sublimation ink-
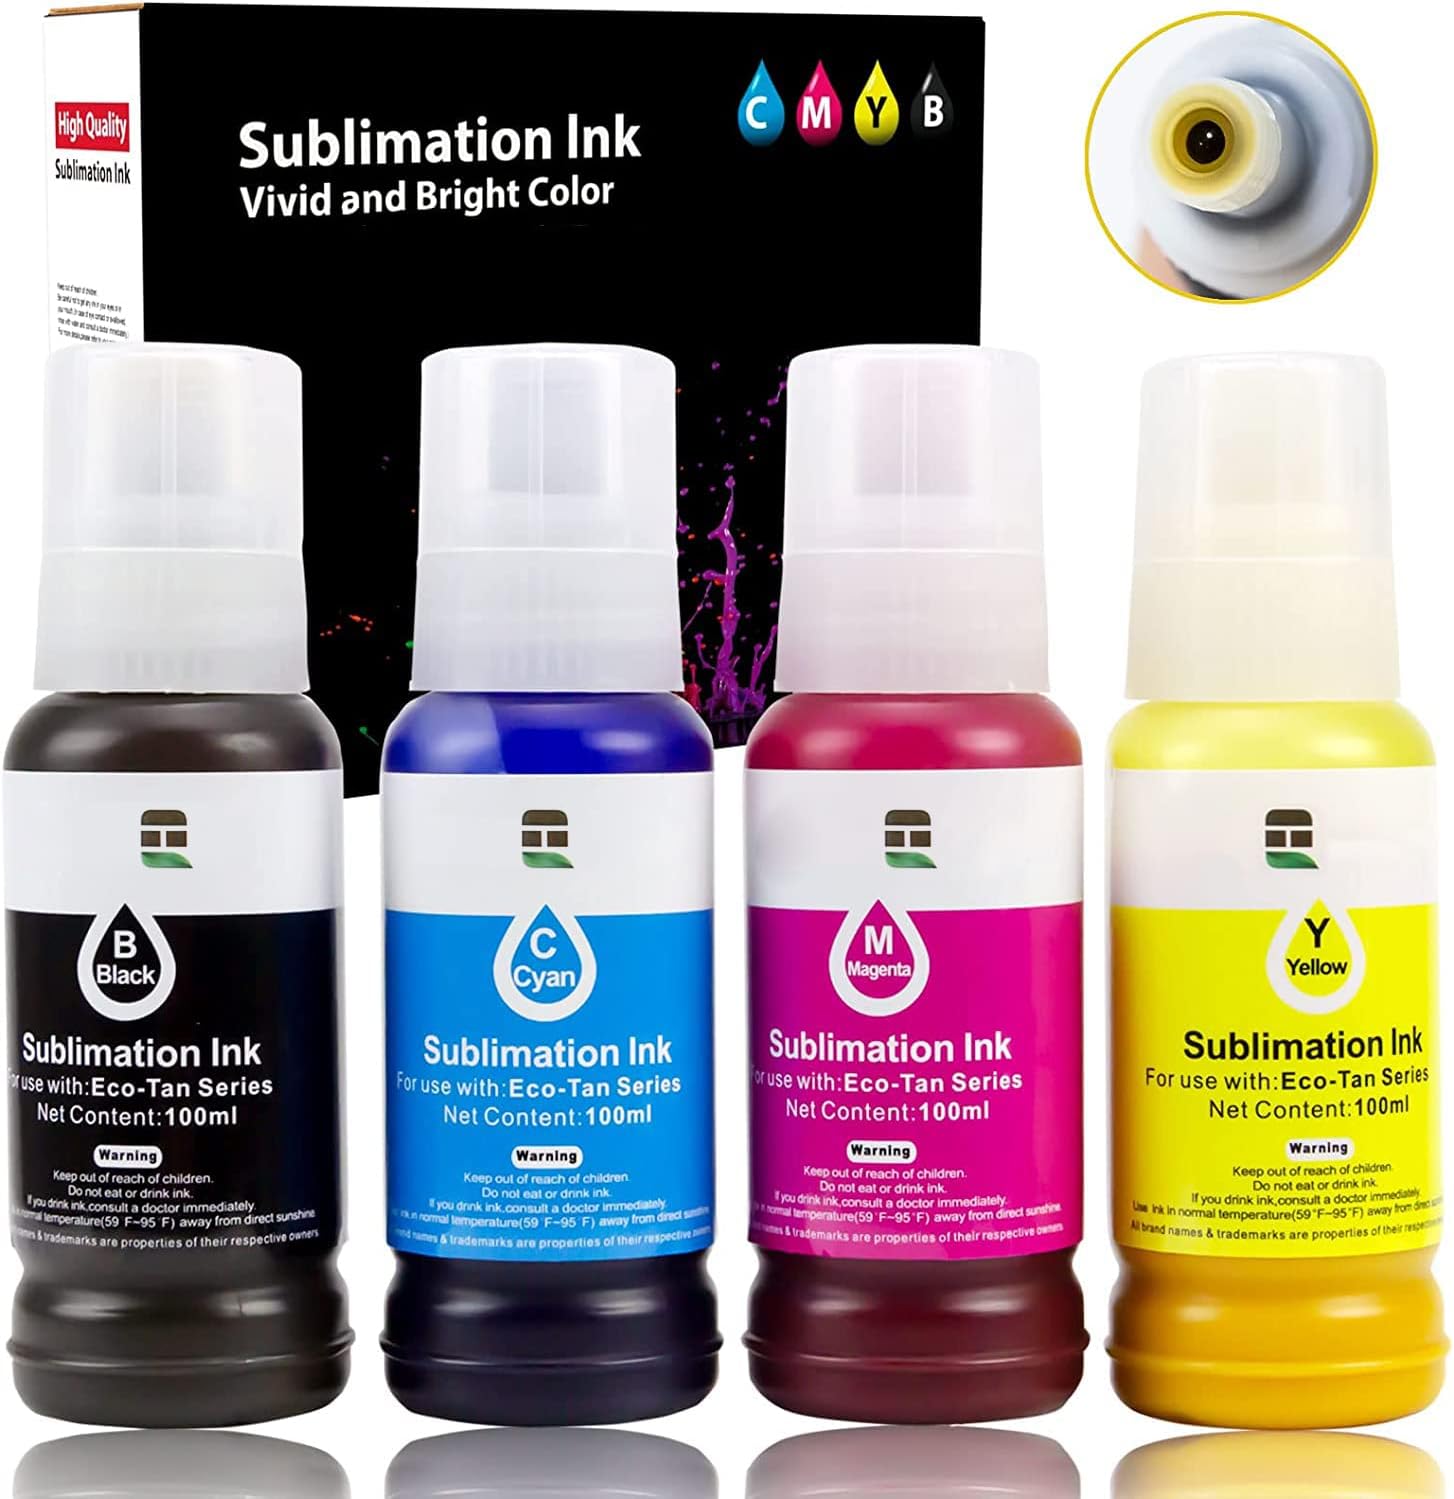
- The sublimation ink should have high color fastness. This will ensure the color doesn’t fade right away after printing and stays durable for a long time. The MERRYWORK Sublimation Ink is one of a kind that you can try to sustain your sublimation prints.

- You should choose a sublimation ink that is compatible with your printer’s printhead model. Simply, select a sublimation ink of the same brand as your printer. For example, if you have an Epson sublimation printer, you should go for Epson-compatible sublimation inks.
- Make sure the sublimation ink has enough resistance to sedimentation. This will prevent the ink from blocking the printhead.
- The ink’s dye particle size should be less than 0.1μm. Otherwise, you won’t have smooth ink application. Contact the manufacturer to ensure the ink dispersion.
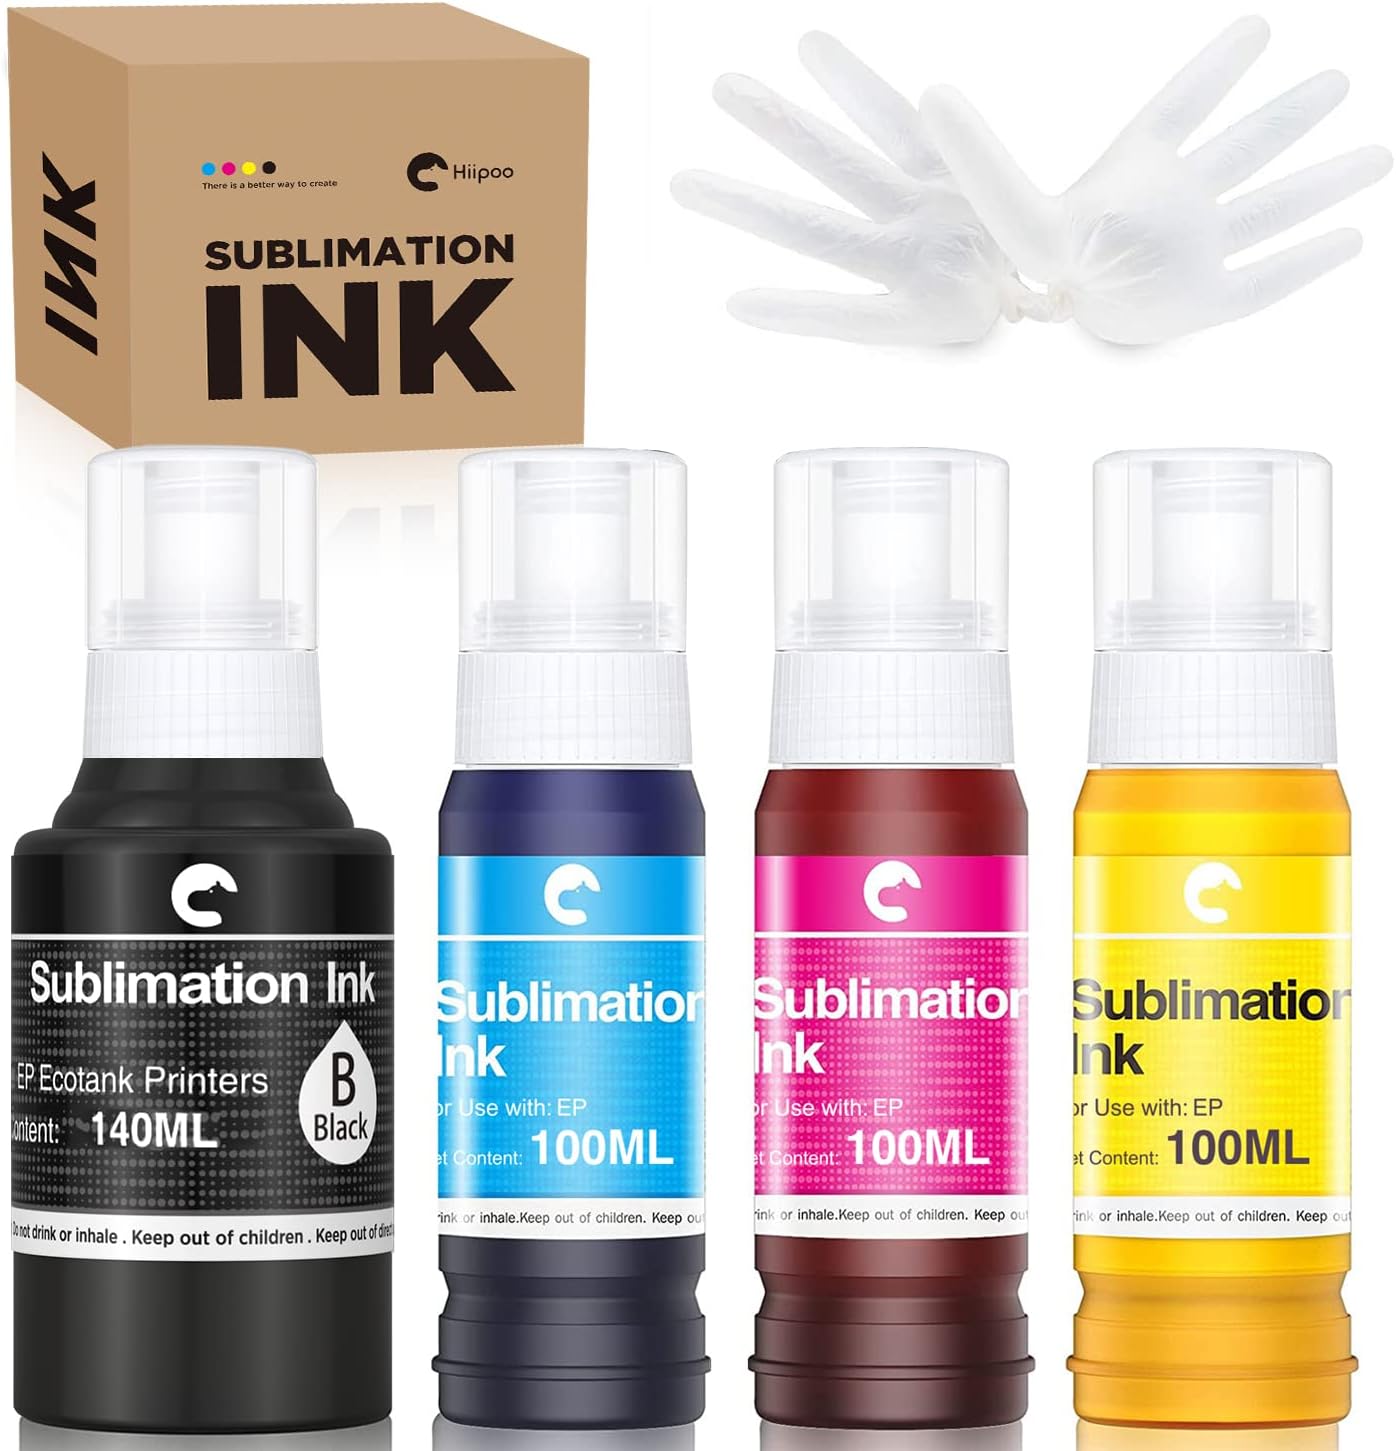
- Again, high-quality sublimation inks have a bright hue and permeability feature. You should check if the color reproduction capacity is high. Hiippo’s sublimation inks are the best in this case.
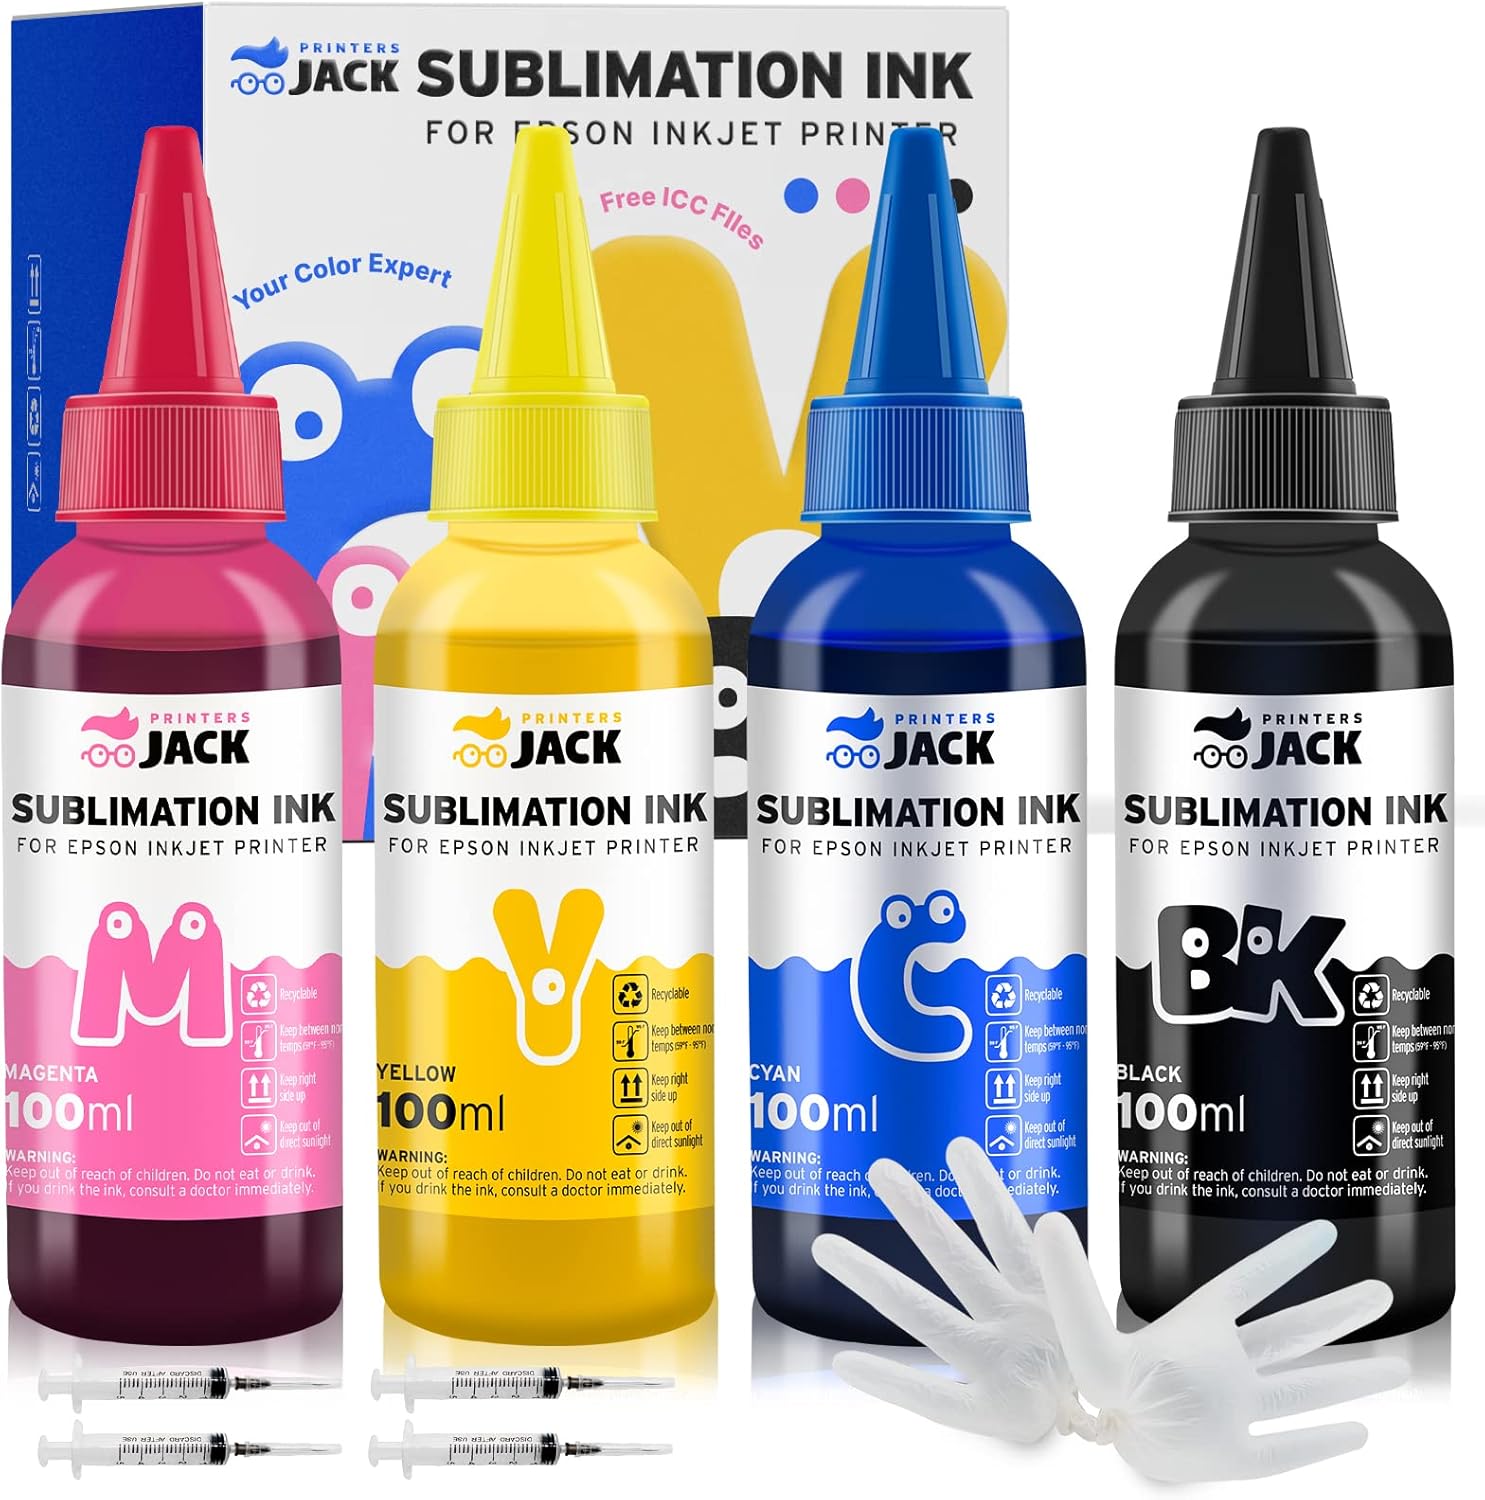
- Keep in mind that being “high-quality” won’t always mean it’s best for you. You have to select the ink based on your intended use. For example, if you’re aiming to achieve a high saturation and color reproduction, aim for Printers Jack Sublimation Ink.
Rookie Mistake Alert!
Don’t combine old ink and new sublimation ink from different brands. Otherwise, the ink will lose its consistency and quality.
2. Quality Sublimation Printer
Now, without a full-functional sublimation printer, first-grade inks will become worthless. That’s why, you must ensure your sublimation printer has all the advanced features to produce professional prints.
Here are the things you should consider in a sublimation printer-
- Select a printer with inkjet technology. Avoid laser printers entirely as you’ll be working on color profiles; not fast printing.
- You should choose inkjet printers that have refillable ink bottle options. It’ll help you to save time and money on unnecessary cartridge costs. You can check out the Sawgrass SG500 printer as the best fit for this case.

- Next, it’s important to check the number of ink tanks the printer comes with. Though 4 ink tanks can produce brilliant results, more than 4 will allow you to work on complex designs. So, if you constantly work with complex color tones, you should have sublimation printers with 6 or 8 ink tanks.
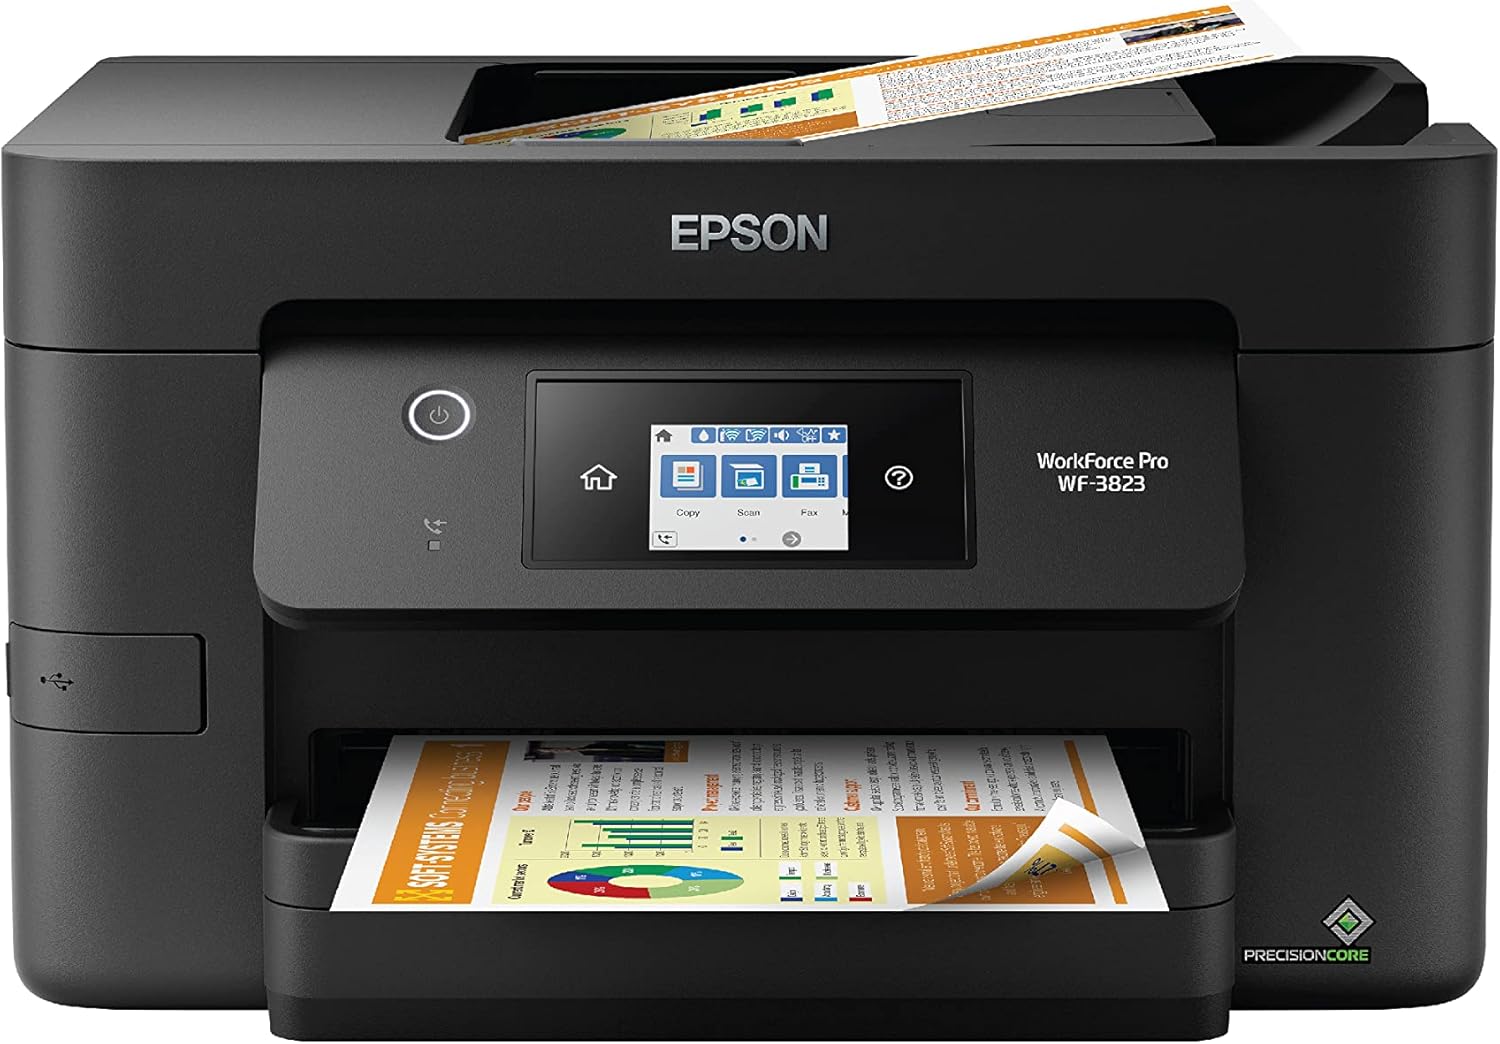
- Again, sublimation printers with high-quality features can improve the brightness of the print. For example, Epson EcoTank and Workforce don’t have clog-heads or ink-drying issues. So, the ink distribution becomes smooth and even.
- Now, if your sublimation printer has an ink-controlling feature, it’s a bonus for you. You’ll be able to control the ink level and color tones using the printer.
3. ICC Profiles
Another way to make your sublimation print brighter is to use ICC profiles. It’s hard luck to get accurate printing results with your default printer settings. So, utilizing ICC profiles can change the output entirely for better improvement.
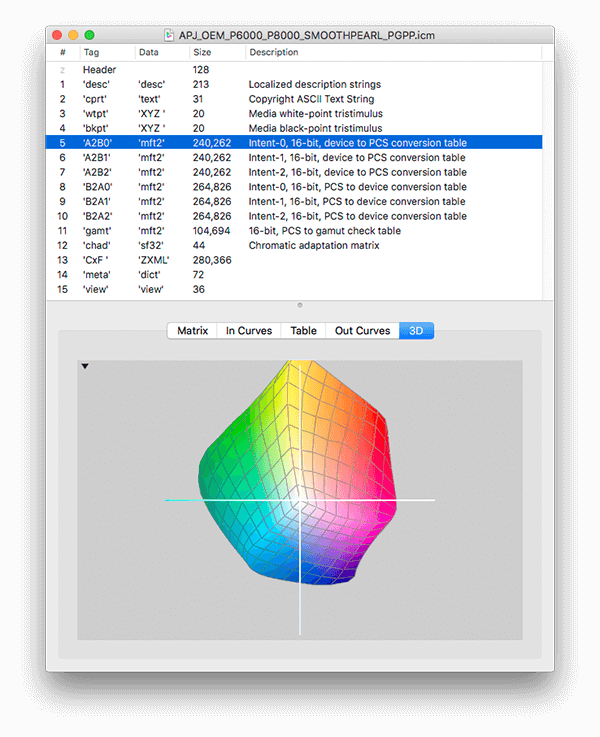
Here’s how it works –
- ICC profile uses the RGB color spectrum. So, you can utilize different vibrant shades that your printer’s CMYK inks can’t.
- You can manually change the color brightness, tone, saturation, and contrast with the ICC profile. Even if you want to make the sublimation print darker.
- Using the sublimation color correction software, you can activate multiple colors and viewing conditions. This helps in achieving accurate color reproductions.
- Apart from brightening sublimation prints, ICC profiles also save you from wasting time in trial and error. However, you might see slight tone changes after printing on the substrate.
- Overall, ICC profiles help you manage the appearance of your print manually. You don’t need to wait to get lucky with the default settings of your printer.
4. High-Quality Sublimation Paper
Using top-grade sublimation paper is as important as using high-quality ink and printer. If the sublimation paper isn’t capable of adhering to the ink, the print will look faded.
That’s why, it’s important to invest in high-quality sublimation papers. Don’t worry, these papers also come in a budget-friendly option that can produce vibrant prints.

You should look for the following aspects when choosing a “high-quality” sublimation paper-
- The paper should have excellent ink absorption capacity. Otherwise, the design won’t stick to the substrate after press.
- Make sure one side of the sublimation paper has a polymer coating. The higher the poly count, the more vibrant the print will look.
Beginner’s Note: If your ink isn’t transferring applying heat, you might be pressing on the wrong side of the paper.
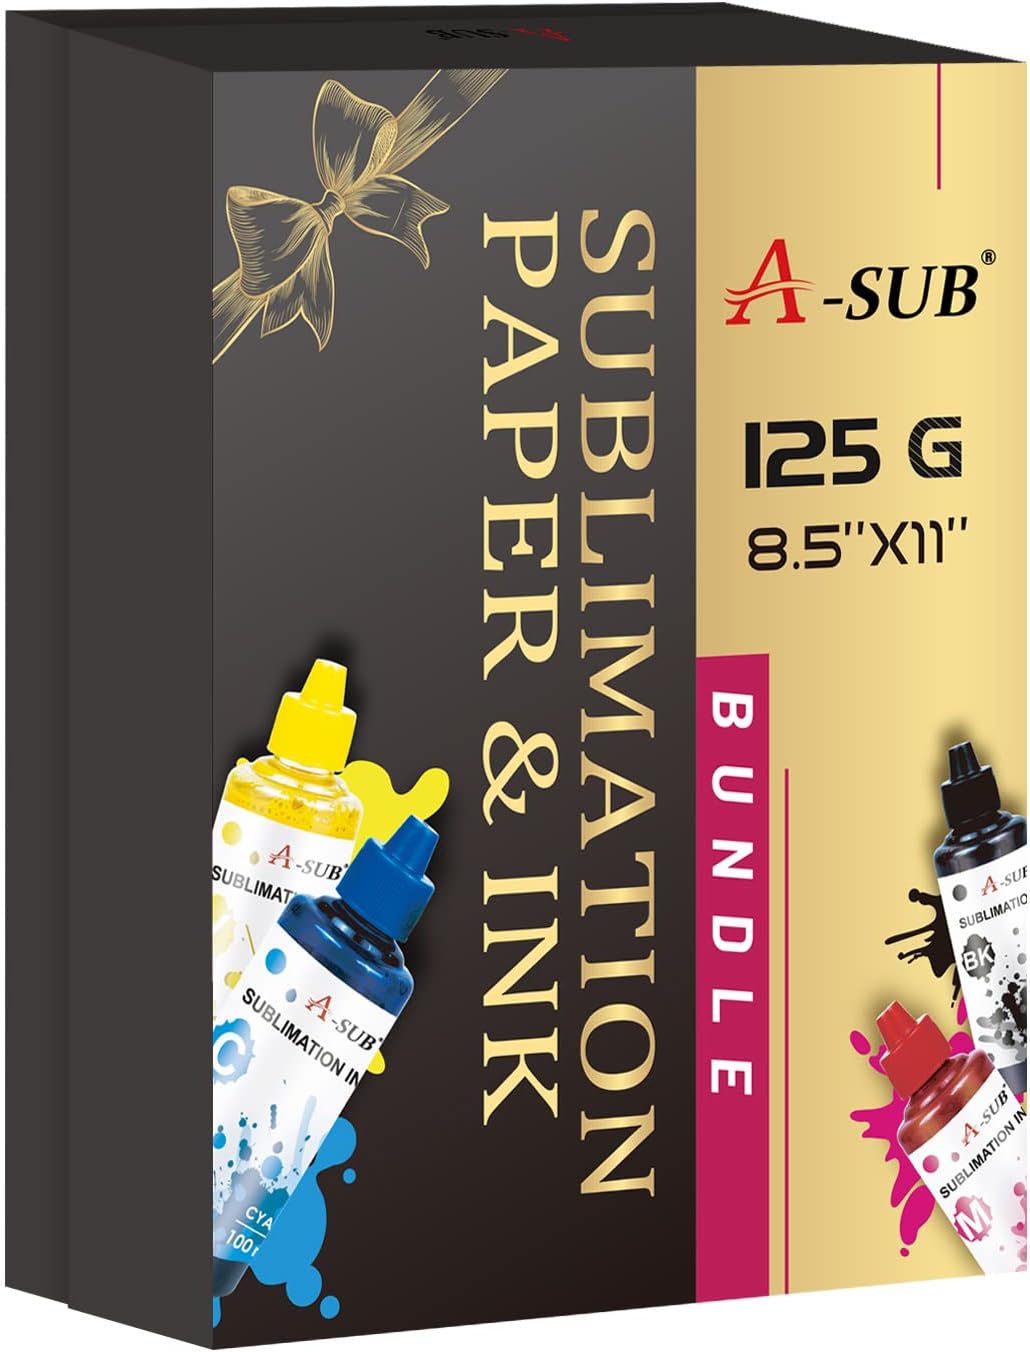
- For saturated and condensed colors, you must choose a heavy paper. It will absorb all the moisture and prevent the paper from curling or warping. The A-Sub 125 GSM is a great choice in this case.
- Moreover, you have to find a sublimation paper that is compatible with your printer.
- Consider humidity as well while choosing sublimation papers. If the humidity is low, go for a light paper like an 80 GSM paper. You’ll be able to prevent clogging the printhead.
5. Quality Substrate Choice
The quality of the substrate also matters when you’re trying to achieve a bright sublimation print. You have to apply different temperatures and pressures according to the substrate type and quality. For example, fabric requires pre-heating but ceramic doesn’t.
Again, polyester and cotton fabric will give you two different kinds of output. The more polyester count you’ll have, the better your prints will turn out. Using a low-quality substrate won’t sublimate evenly and fade within a few washes.
So, if you want vivid, durable sublimation prints, you should consider the factors below.
- Whenever you’re buying a substrate, always opt for the premium grade.
- Make sure the substrate has a high-quality polymer coating. Otherwise, the print won’t transfer effectively.
- Always do your research if the substrate is compatible with sublimation printing.
- Check whether the substrate can withstand high temperatures and pressure.
- Buy a substrate that has a smooth finish. It will help the ink distribute evenly on the surface.
6. Adequate Image Resolution
Sublimation print quality also depends on image resolution. If your image resolution is lower than 300 DPI, the print will look faded.
By tweaking your printer’s settings, you can alter the resolution to a high-quality print. Moreover, enhancing the dots per inch (DPI) and pixels of your photo will make it more realistic.
So, before printing your photo, you have to maintain the following aspects-
- Set the printer to “high-quality” print settings.
- Select the “low speed” and “premium matte paper” settings.
- Sharpen the photo and keep the resolution more than 300 DPI.
- Create, save, and download the images in PNG or SVG format.
- Adjust the brightness level on the designated area to make the print more vibrant.
Remember that, you’ll need to maintain different image resolutions in different scenarios to print vibrant outputs. For example, color print and monochrome print won’t require the same resolution. The same goes for laser and inkjet printers.
You can check out the table below to learn what resolution is required in each circumstance.
| Condition | Image Resolution Required |
| Color or Grey-Scale Images (Inkjet Printer) | 250 to 360 DPI |
| Documents (Inkjet Printer) | 250 to 300 DPI |
| Dye Sublimation Printers | 300 DPI |
| Laser Printers | 300-1200 DPI |
| Line Art (Inkjet Printer) | 300-600 DPI |
Expert Opinion: We recommend using dye sublimation printers or inkjet printers for best results.
7. Correct Image Sizing
Well, image resolution also depends on the correct size of the image. Large file sizes can make your image blurry. On the contrary, extremely small image sizes can miss the details.
That’s why, you need to balance the image size, format, and resolution to create the most vibrant prints.
The most common transfer papers come in 8.5″ x 11″ and 8.5″ “14” dimensions. But if you require a different size, you can check out the table below for the correct resolution.
| Media Size (inches) | Image Resolution (Pixels) |
| 16″ X 20″ | 4800 X 6000 |
| 20″ X 30″ | 6000 xX 9000 |
| 30″ X 40″ | 9000 X 12000 |
| 40″ X 60″ | 12000 X 18000 |
| 48″ X 96″ Full sheet | 14400 X 28800 |
Note: Following the image size and resolution ratio from the table, you’ll see no grain on the final print.
8. Appropriate Heat Press Settings
Choosing the wrong heat press settings can really mess up your sublimation designs. Excessive high temperatures can flush your prints.
Conversely, extremely low temperatures can result in uneven ink distributions. Maintaining the pressure and time is also similarly important.
So, setting the heat press to the correct temperature is an essential step to get bright sublimation prints. Here’s a step-by-step guideline for setting the heat press correctly.
Step 1: First, put your heat press on a flat surface and plug it directly into an outlet. Avoid plugging into the extension cords or surge protectors. Otherwise, your heat press can get damaged due to unwanted voltage spikes.
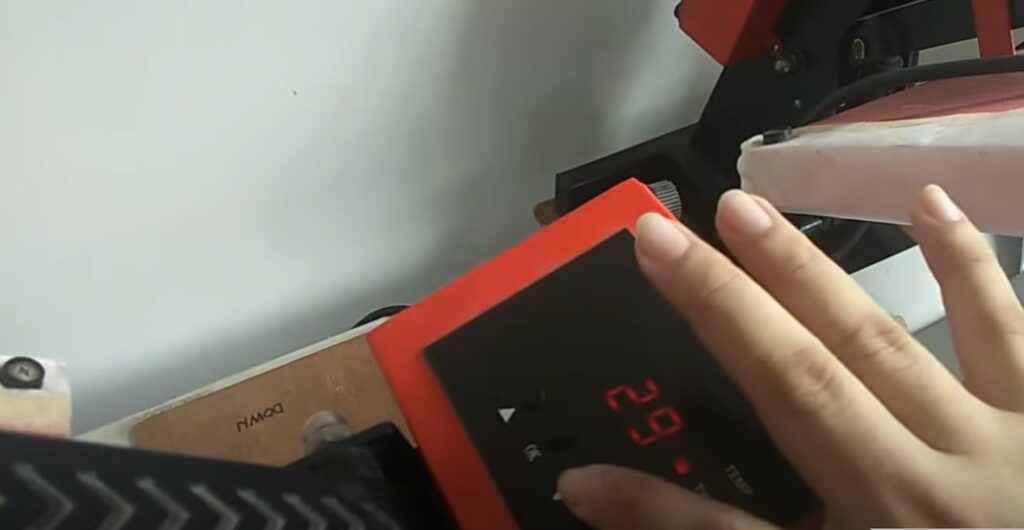
Step 2: Next, switch on the heat press. You’ll find an ON-OFF switch near the screen. Push the switch to activate the heat press.
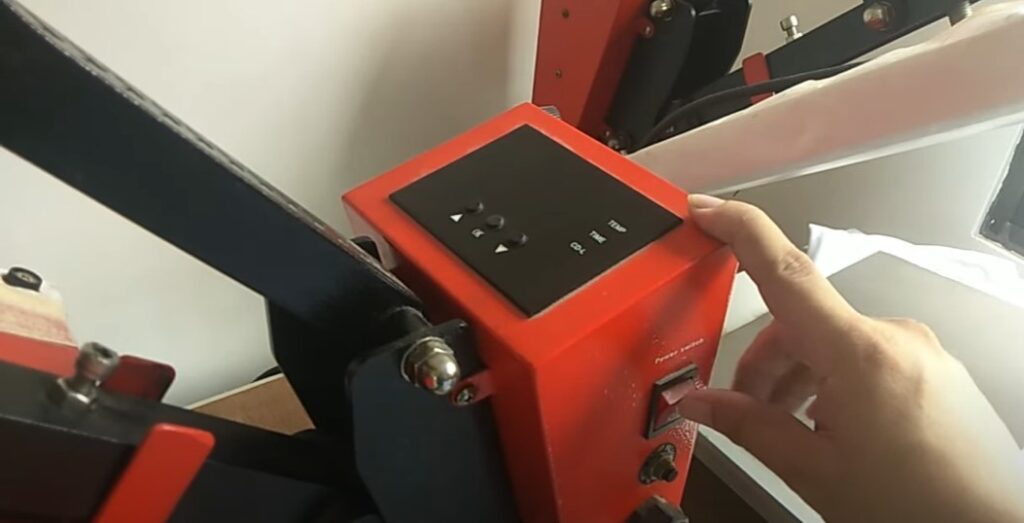
Step 3: Then, press the OK button in the middle to set the temperature to Celsius. If you want to measure the temperature in Fahrenheit, you have to press the upward-arrow button next. Note that by pressing the down-arrow button, you can go back from Fahrenheit to Celcius again. Press on OK and the measurement will lock-in.
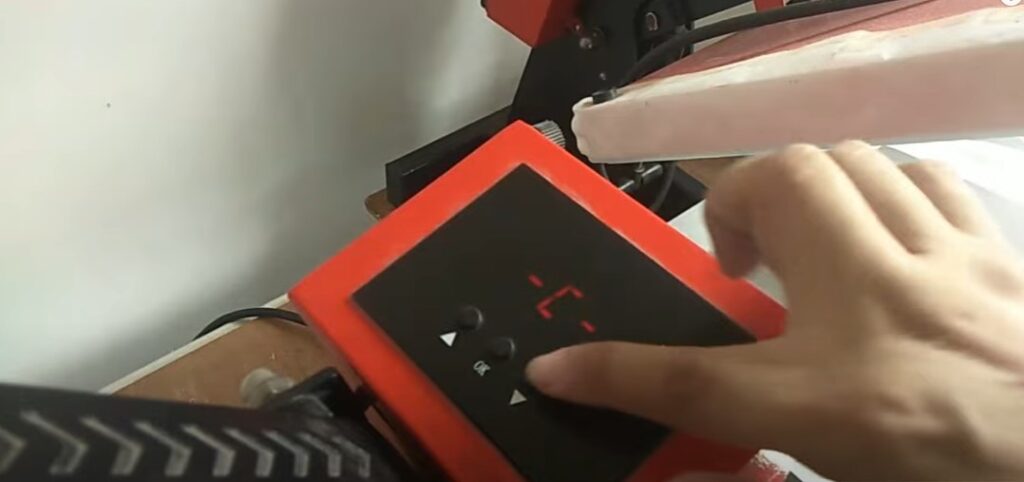
Step 4: After that, set the required preheat temperature using the up and down arrow buttons. If you’re pressing a polyester t-shirt, you should set it above 400F. Make sure to check the appropriate temperature required from the manufacturer’s label.
Step 5: In the next step, you have to click on OK once more to set the time. Then, use the arrow buttons to increase or decrease the duration. Make sure to set the correct time according to your substrate.
Step 6: After setting the heat press, you have to lay your sublimation blank on the tray. Give it a light press to preheat the sublimation blank.
Step 7: Finally, place the sublimation transfer paper on top of the blank. Then, apply medium to high pressure with the heat press. After the heat press is done, you’ll see a beautiful vibrant print on your substrate.
9. Consistent Pressure Application
Now, the color vibrancy of your sublimation print can change depending on how much pressure it receives. If you don’t apply consistent pressure on all parts, the sublimation print won’t look smooth.
With high pressure, the sublimation print will have uneven spots all over the substrate. On the contrary, the print will look dull and flushed with low pressure.
So, you must check the product description before pressing to ensure the correct pressure. Remember that dye sublimation requires medium to high pressure.
10. Optimal Transfer Time
When you’re using multiple substrates, you have to select different transfer times in your heat press. It’s because each material composition is different than the other. So, the sublimation ink transfers at a different point of period for each substrate.
Now, there’s also a relation to the temperature here as well. When the temperature is low, you have to set the time higher. The same goes for the opposite scenario.
By constant trial and error, you’ll find your optimal transfer time. It’ll help you to print vivid images every time.
However, if you want to save time, you can check out the following table on optimal transfer time for each substrate.
| Substrate | Optimal Transfer Time | Temperature | Pressure |
| Garments (Polyester) | 45 seconds | 400℉ | Medium |
| Garments (Cotton) | 15-20 seconds | 380℉ | Medium |
| Vapor Apperal | 45-55 seconds | 380-390℉ | Medium |
| Ceramic Mugs | 150-210 seconds | 350-400℉ | Medium |
| Glass/Ceramic Flat Tiles | 300-720 seconds | 380-400℉ | Medium |
| Canvas Material | 150-210 seconds | 350-400℉ | Medium |
11. Avoiding Ink Saturation
Let’s speak about the bane of for your sublimation print – ink saturation. High levels of ink saturation can ruin your whole design. It happens when the colors don’t match with your original print.
Either you have the wrong printer settings or the sublimation ink is not up to the mark. So, how to fix sublimation colors?
Follow the solution below-
- First, you have to ensure that your designs are vibrant enough. If the original image needs color corrections, you can’t predict the output.
- Set your printing software to the highest quality possible. You will see an option like “High Resolution”, “High Quality”, or “Best Quality” depending on the application you’re using.
- Adjust the color profiles, saturation, contrast, hue, and any other tweaks you need to do.
- Make sure to insert high-quality sublimation ink and paper compatible with your printer.
- Use the correct sublimation paper to avoid any kind of moisture. Otherwise, the sublimation print will smudge or bleed ink.
- Finally, you must be careful about setting the correct time, temperature, and pressure in the heat press. It will not only make your sublimation prints brighter but also reduce ink saturation problems.
12. Proper Image Drying
You must dry the sublimation print before placing it in the heat press. The wetness isn’t visible to the naked eye. But if you touch the print without drying, it’ll leave fingerprints.
So, here are some tips on proper image drying to achieve perfect sublimation prints-
- Don’t touch the print immediately after printing. Let it cool down for a while.
- Keep the image for 10-15 seconds on the heat press tray before sublimation.
- Only use the lint roller after the image has completely dried.
- Don’t move the sublimated item while it’s warm.
- Dry thick sublimation papers for a longer time than drying thin sublimation papers.
13. Preventing Image Ghosting
Image ghosting or blurry images can degrade the quality of your sublimation. It happens when you don’t maintain the correct heat press settings. Similarly, if the paper isn’t dry, it’ll create blurry images.

So, you must follow the instructions below to prevent image ghosting in your sublimation project-
- Use thin transfer paper so that the ink dries fast.
- If you’re using thick transfer paper, make sure it dries fully before sublimation.
- Secure the transfer paper with heat-resistant tape. It’ll prevent ink smudges.
- Adjust the heat press pressure before placing the paper on the heat press.
14. Adequate Heat Distribution
It’s important to ensure even heat distribution while sublimating your item. It’s only possible by setting the correct temperature designated for each substrate.
Here are some more tips on achieving adequate heat distribution-
- Use high-quality, smooth finish sublimation blanks.
- Make sure the heat press is capable of evenly distributing heat.
- Find the exact correct temperature for your item. You can either find it in the manufacturer’s instructions or by trial and error.
- Don’t let the transfer paper move while sublimating. Otherwise, you’ll have uneven prints on the substrate.
15. Cleaning The Printhead
Sublimation printers can often produce low-quality images due to clogged printheads. Sometimes the sublimation ink refillable bottles spill. The ink dries in the printhead and affects the banding of the image.
As a result, the printer misses lines, streaks, or even produces blurry images. So, if you want to fix your sublimation prints, follow the methods below-
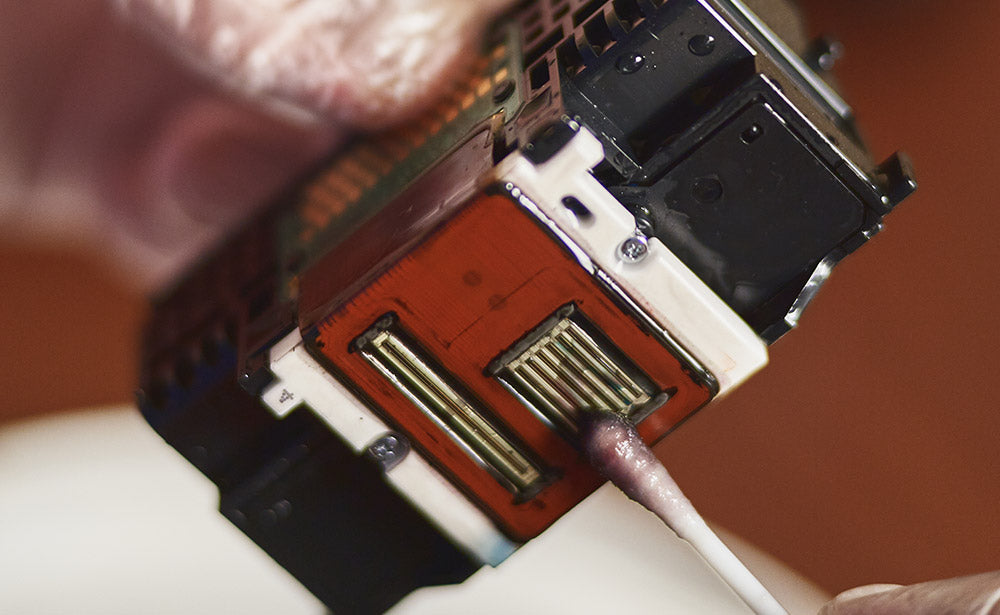
- First, power off your sublimation printer and remove the printhead. As soon as you see the wastage pad, drop 3-4 drops of hot water with a syringe. The inks will flow out. If there’s too much water, wipe it out with a lint-free cloth.
- You can also clean the printhead by sliding a clean paper towel under the printhead. Blow some air with a syringe through the nozzle. The printhead will unclog easily.
- Printing on a purge sheet in a premium matte setting fixes faded lines and streaks. You must check the nozzle each time you finish printing. As soon as you start getting vibrant prints, this means the printhead is cleaned!
2 Best Spray To Make Sublimation Brighter
Want to take your sublimation prints to the next level? Sublimation sprays can help you with that! Here are two of the best sublimation sprays that can enhance the beauty of your sublimated designs.
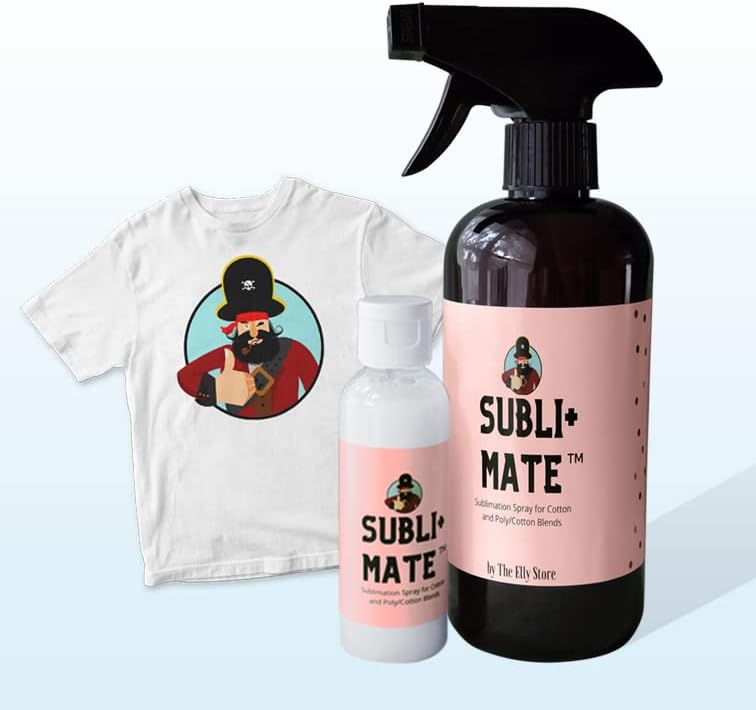
1. Subli+Mate Sublimation Spray

The Subli+Mate sublimation spray can be a wonderful addition to your sublimation supplies. This spray allows you to make your sublimation print brighter.
You can use it on both 100% cotton and polyester fabrics and still achieve the same kind of results.
It also comes with clear instructions on how to spray on your substrate. Mostly, it works great with bleached, white, and light-colored shirts. You can also use the spray in dark shirts but the prints don’t look much visible.
However, on light-colored fabrics, it produces a nice matte finish. The colors look almost similar to the original one. For a ready-made spray under $20 (200ml), this is a hit!
2. Sublimation Spray for Cotton and Polyester
Here’s another sublimation spray to make sublimation brighter. It’s also a Subli+Mate production which works great for less than 50% polyester material.
It’s a 3 oz. concentrated spray that needs dilution. You can use it on polyester and cotton fabrics, canvases, and papers. It’s a water-based spray. So, it doesn’t leave any unwanted spots on the substrate after drying.
This spray gives a satin finish to your sublimation prints. It concentrates the colors more and gives a vibrant outlook.
Not to mention how durable it makes your print. You can easily wash it without the fear of fading your design.
However, you must be careful while spraying. It can leak from the sides sometimes. This is the only drawback this sublimation spray has. But considering the effectiveness, this sublimation spray is worth it.
How To Make Your Epson Sublimation Printer Print Brighter?
Epson sublimation printers are great for creating complex vibrant images. You’ve probably even tweaked the designs using the ICC profile installed in your printer’s drivers.
With the help of Silhouette Studio, you can enhance the quality of your picture even more!
So, here’s how you can make your Epson printer print brighter than before-
- First, open Silhouette Studio on your computer and upload your preferred design. Size it as you like.
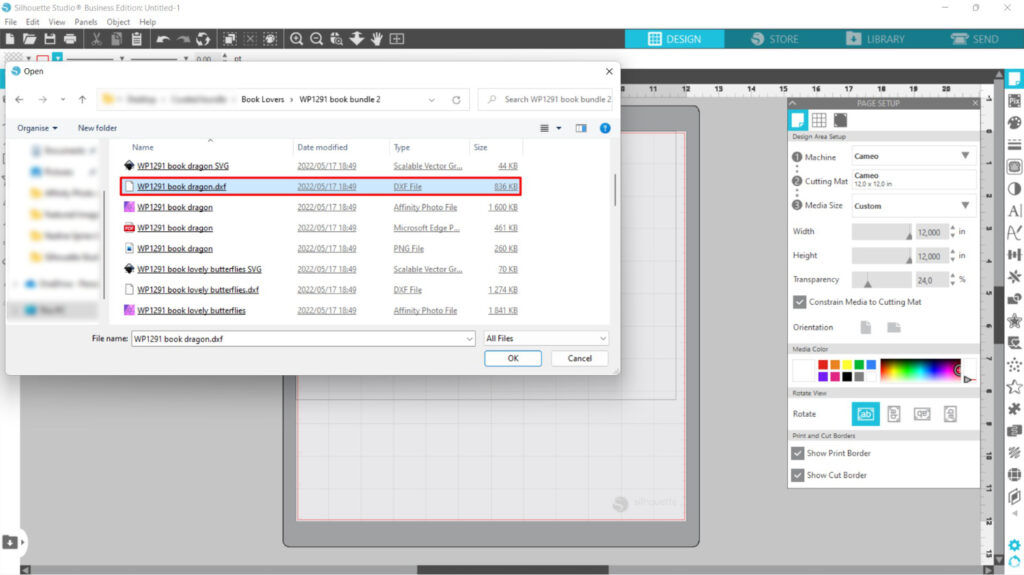
- Then, click on Print from the tab in Silhouette Studio. You’ll see a dialogue box opening. Select your printer’s name from the list of printers shown in the dialogue box.
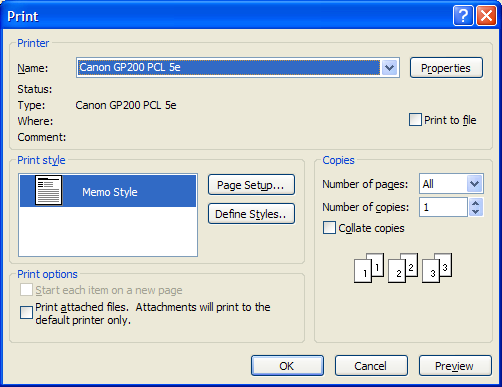
- Next, click on Preferences in the down-right corner of the printer list. As soon as you click, the Printer Settings Tab will come right in front of you.
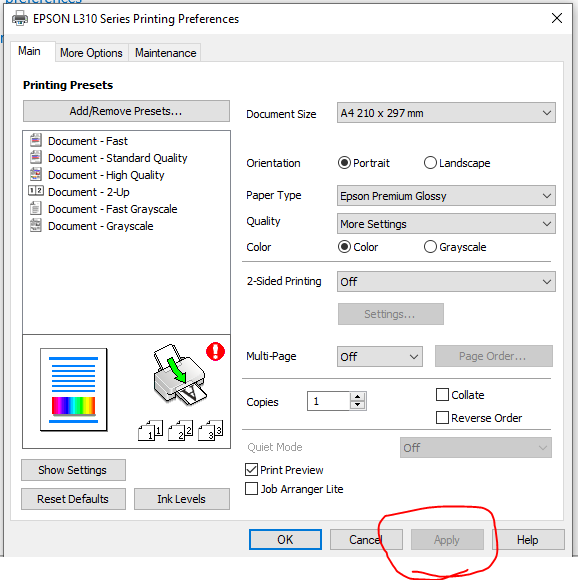
- Now, you’ll change the settings in the Main Tab. Set the following options:
- Paper Source: Cassette 2
- Document Size: Letter
- Orientation: Portrait
- Paper Type: Presentation Paper Matte
- Color: Color
- Quality: High
- After that, click on the More Options tab and select the check box for the Mirror option. Then, click on OK at the bottom right corner.
- Then, you have to go to your Epson printer and apply the same settings. For this, you need to follow the next commands, Settings> Printer Settings> Paper Source Settings> Paper Setup> Cassette 2> Paper Size> Presentation Matte

- Finally, go back to your computer and press Print.
You’ll notice how bright the sublimation print looks with this setting rather than the basic setting on!
How To Make Sublimation Brighter After Heat Press?
Sometimes you can receive a faded print after sublimation – even if you’ve set the right temperature settings.
Mostly it happens when your heat press becomes old or you’ve not set the printer settings properly.
Whatever the reason is you can make sublimation brighter after heat press. All you have to do is reheat the already sublimated area.
Set the temperature to 330℉ for 25 seconds. Then, take the substrate out of the heat press. You’ll see the sublimation got more vibrant and saturated.
Though it’s a simple trick, we recommend only professionals apply this method. In case you mess up with the heat settings for different substrates or materials, you can ruin the sublimation print.
Note: Keep in mind that each heat press power can vary from the other. If your heat press gets excessively hot easily, you have to set it to a lower setting than usual. After a trial and error process, you’ll figure out the best setting for you.
How To Make Sublimation Brighter On Mugs And Tumblers?
To make sublimation brighter on mugs, first, you must ensure the mug is a sublimation blank. Regular mugs don’t contain polymer coating. So, the sublimation ink won’t bind on regular mugs.
Well, the main trick here relies on using high-quality sublimation ink, paper, and printer. You must ensure each of these supplies can guarantee smooth printing.
Now, when you’re on to making bright sublimation prints, you must change the color profile. Adjust the tone, hue, saturation, and ink levels using sublimation creative software.

Next, you have to be careful about choosing the heat press settings. If you’re printing ceramic mugs, the temperature should be within the 350-400℉ range. You should press it at a medium level for about 250-210 seconds.
For Cricut mug, it’s 350-360 seconds at 392 – 400℉. Make sure you press it at 40 PSI.
Now, are you thinking about how to make sublimation brighter on Tumbler? Well, the rules are pretty much the same as sublimating bright designs on mugs.
But stainless steel tumblers require a temperature of 375℉. You should press it at 40 PSI for 45 seconds. If it’s made of metal or aluminum, the time, temperature, and pressure are 60-80 seconds, 400℉, and 40 PSI respectively.
How To Make Sublimation Brighter On Tshirt?
It’s not difficult to make sublimation brighter on shirts. First, you have to start with the polyester counts of your t-shirt. The more the polyester counts, the better the sublimation ink will look.
So, choose at least 60% polyester blends to create bright sublimation prints on your t-shirt. Use premium-grade sublimation ink, transfer paper, a printer, and a heat press.
You must ensure the design has the correct size and resolution depending on the area you want to sublimate.

You can also use a sublimation spray before sublimating the t-shirt. It’ll add an extra layer of polymer coating to make the design more vibrant. It can even sublimate cotton t-shirts nicely.
Now, tweak the color settings in the printer to get the most vibrant prints. Then, place the t-shirt on the heat press with the correct temperature and time settings.
If your heat press produces faded prints, you can reheat the sublimated area and bring them to life!
5 Factors Affecting Sublimation Brightness
There are 5 major factors that can ruin your sublimation print entirely. Take a look at the segments below to understand what can affect your sublimation print’s brightness-
1. Heat Press Settings
The brightness of sublimation prints mostly depends on the heat press settings. You can’t expect to have a good sublimation print at any temperature.
Depending on the material you’re using, you have to set the correct temperature and time in the heat press. Make sure to put enough pressure to properly imprint the sublimation design.
In case you fail to do so, your designs will look flushed. Again, if you overdo the time and temperature, the design can have orange spots as well.
So, it’s best to check the manufacturer’s guidelines on what time, pressure, and temperature you should use.
2. Low Levels of Sublimation Ink
When your sublimation ink reaches the bottom, it will affect the print quality. Your printer won’t be able to pull up the required amount of ink. As a result, you’ll find a faded design on the sublimation paper.
So, it’s wise to check the sublimation ink levels every once in a while. Some printers even come with ink control technology. You can monitor the ink levels without checking the ink cartridges inside.
By refilling the ink tanks, you’ll be able to produce bright sublimation prints again. However, make sure you use a high-grade sublimation ink. Otherwise, the refills won’t work. You’ll get faded images.
3. Printer Settings
Having the default printer settings can mess up the color vibrancy of your print. Sublimation prints require a change of settings to ensure vibrant prints. For example, you should set the printer to “High Quality” settings.
The paper type should be selected as “Presentation Matte Paper”. Check whether the Paper Source is set to “Cassette 2” and Document Size to “Letter”. Don’t forget to enable the color print option for your color images.
You should also care about setting the ICC profile. It has a major effect on impacting the sublimation print color scale.
4. Quality of Sublimation Paper
When you use low-quality sublimation paper, it will affect the brightness of your print. Thick sublimation papers help to absorb moisture from the ink.
So, if you use thin sublimation paper for highly saturated print, you’ll not receive the correct brightness.
Again, you should also choose a sublimation paper based on the humidity. Make sure sublimation paper can adhere to ink properly. Missing out inks will leave the sublimation print dull and boring.
5. Printhead Issues
Sometimes your printer’s printhead can get jammed by refillable ink cartridges. Low-quality inks can clog the nozzles. So, the sublimation print becomes faded due to less ink.
In some cases, you’ll notice faded shades and blurry streaks in your image. You’ll need to clean the printhead to get rid of this issue.
Also, make sure you’re not running low on ink. Low levels of inks are also the reason you don’t get bright sublimation prints.
Maintaining and Protecting Sublimation Brightness
It’s not enough to create bright sublimated images and leave them unattended. If you want to protect the vibrancy for a long, you must have a maintenance routine for your sublimation prints. Here are 5 tips on taking care of your sublimated items.
Store in a Dry Place
Sublimation prints can react under moisture and humid weather. So, if you want to protect your sublimation print, you must store it in a dry place. It’s better to keep them away from any kind of liquids nearby. You won’t have accidental spills then.
Avoid Warm Environment
Another way to protect your sublimated items is by avoiding a warm environment. Heat and moisture can make the prints smudgy.
So, it’s safe to store in a cool place where the temperature is normal. You can keep the sublimated item in the attic, basement, or garage.
Keep it in a Dark Place
Well, sublimation prints can fade under light. Especially, if it’s sunlight. The ultraviolet ray reacts with the sublimation ink. So, the ink can lose its brightness.
That’s why, it’s important to store your sublimated items in a dark place where sunlight can’t reach. Make sure there are no lint or dust particles in the air.
Dry the Print Completely
Again, if you don’t dry the sublimation print before transfer, the ink can bleed. You can also get lint-roller marks on your sublimation print. So, you must wait until the print has dried completely.
One way to do this is to keep the print on the preheated heat press for 10-15 seconds. Your sublimation print will become crisp and vibrant. The print will retain its vibrancy even more after pressing on the substrate.
Wash Gently
Washing sublimation prints in a dishwasher can fade the sublimation print fast. It’s because dishwashers use heat and pressure to clean the items.

With excessive heat and force, the sublimation print can come off. So, you can handwash your sublimated items to protect the brightness of your sublimation print.
FAQs
Can Metallic Elements Enhance Sublimation Brightness?
No, metallic elements can’t enhance sublimation brightness. The quality of the sublimation depends on sublimation ink, printer, transfer paper, color settings, and heat press settings.
Why Sublimation Looks Faded?
Sublimation looks faded when it’s done using ineffective sublimation ink, printer, and transfer papers. Sometimes not setting the color profile correctly can also affect the print. Moreover, if the time and temperature are more than required in the heat press, the sublimation will look faded.
What’s The Trick To Using Gradient Color Transitions For Brightness?
The trick to using gradient color transitions for brightness is to create an additional gradient layer. Make sure to adjust the color contrasts in CMYK. You can do it with any creative software.
Final Words
So, this is all about how to make sublimation brighter. Remember to check the quality of your sublimation supplies before purchasing. Also, take care of your sublimated item after sublimation. This will help to sustain the brightness for a long time.
